If you’ve ever watched a trail of ants march in through a baseboard or around a pipe under the sink, you already know the frustration. What most homeowners don’t realize is that every gap an ant can squeeze through is also a gap that’s quietly bleeding heated or cooled air outside — and outside air is sneaking in. A worker ant can fit through a crack as narrow as 1 mm, and those same cracks collectively account for the equivalent of leaving a window open 24 hours a day in a typical home.
The good news is that ant exclusion and air sealing are essentially the same job. Caulking the common entry points along your foundation, windows, doors, and utility penetrations accomplishes both goals in one afternoon. The Department of Energy estimates that air sealing alone can reduce heating and cooling costs by 10 to 20%, and the caulk and foam you buy to do it costs $20 to $60 total — a payback period measured in weeks, not years.
This guide walks you through exactly where ants get in, which products seal which gaps best, and how to do it yourself in a few hours. Whether you want the fastest possible fix or a thorough whole-house seal, you’ll find a clear approach below with real numbers on what you’ll save.
What You’ll Need
Click on an item below to shop for the recommended items for this recipe on Amazon.
As an Amazon Associate, we earn from qualifying purchases.
How to Do It
- Buy one tube of paintable acrylic latex caulk and one small can of expanding foam sealant (like Great Stuff Pestblock, which contains a pest deterrent).
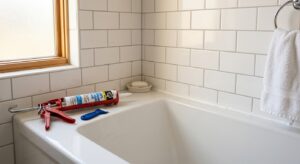
- Check under every sink and vanity for the gap around supply pipes and drain pipes where they enter the wall or floor. Press foam into any gap larger than 6 mm, and caulk smaller gaps flush to the surface.
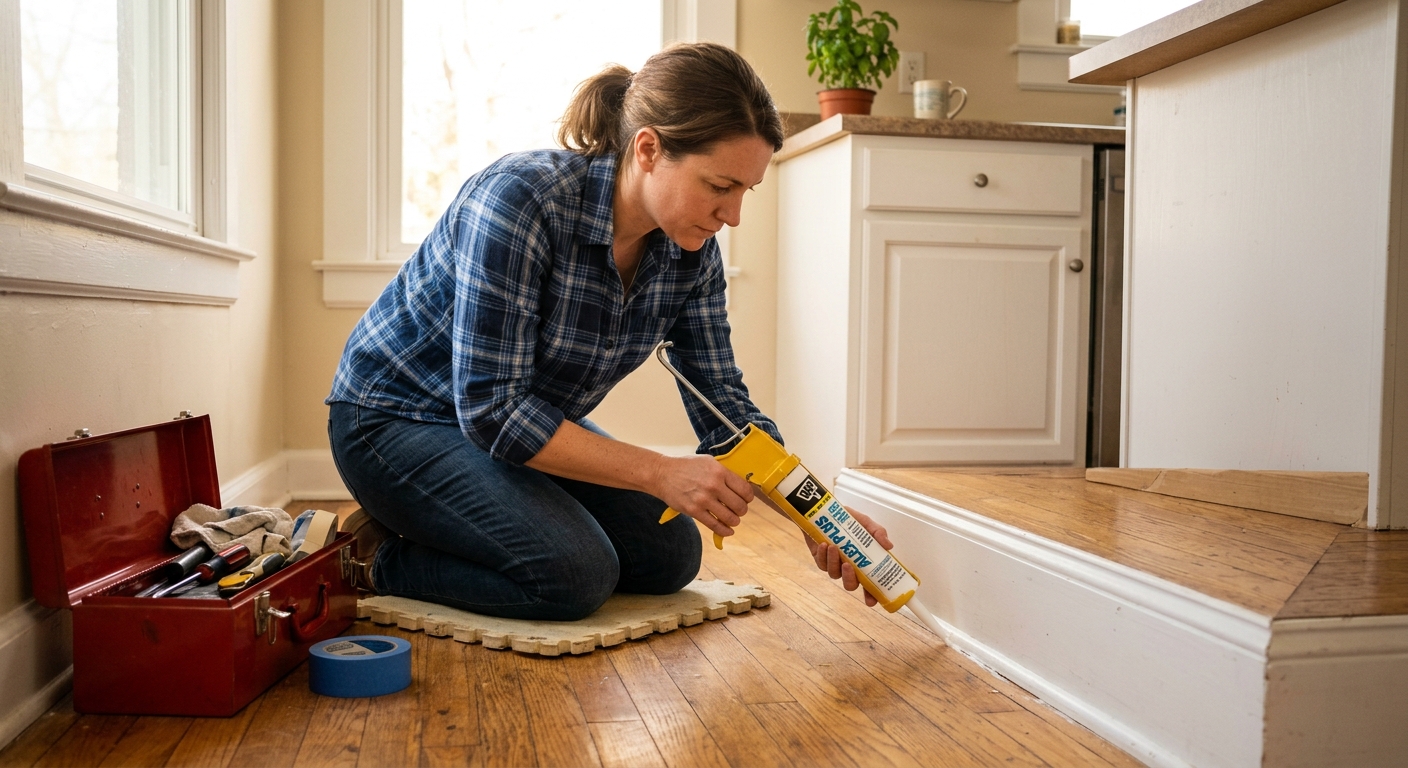
- Run your finger along the joint between your baseboards and the floor in the kitchen and bathrooms. Apply a thin bead of latex caulk anywhere you feel a gap or see daylight.
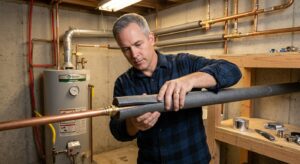
- Inspect where electrical conduit, cable TV lines, or HVAC refrigerant lines exit the house through exterior walls. Fill those exterior penetrations with foam sealant and smooth flush.
- Check the threshold seal under exterior doors. If light is visible under the door when it is closed, install a new door sweep (available for under $15 at any hardware store) using only a screwdriver.
- Gather supplies: one caulk gun, two tubes of silicone caulk (for exterior masonry and metal), two tubes of paintable acrylic caulk (for interior wood and drywall), one can of expanding foam sealant, a utility knife, and a caulk finishing tool.
- Start at the exterior foundation line. Use silicone caulk to seal the joint where your siding or brick meets the foundation all the way around the house. This is the sill plate joint and it is the single highest-impact location for both ant exclusion and energy savings.
- Move to all exterior window and door frames. Apply silicone caulk along every joint where the frame meets the siding. Cut out and replace any existing caulk that is cracked, pulling away, or older than five years.
- Seal every exterior wall penetration: dryer vents, gas line entry points, hose bibs, exhaust fans, and low-voltage wiring. Use foam for gaps larger than 6 mm and silicone for smaller gaps around hard fittings.
- Go inside and seal all interior pipe penetrations in the kitchen, bathrooms, laundry room, and utility closet. Use latex caulk for gaps at baseboards on exterior walls and foam for larger openings around pipes.
- Finish by inspecting your attic hatch if accessible. Weatherstrip the edges of the hatch frame and add a foam gasket if one is not already present, since attic bypasses account for significant infiltration in two-story homes.
- Hire a certified BPI (Building Performance Institute) energy auditor to perform a blower door test, which depressurizes your home and uses airflow measurements to find every significant leak, including ones inside walls you cannot see.
- Ask the auditor to provide a prioritized list of sealing locations ranked by air leakage volume. This ensures any spray foam or caulking work targets the gaps that actually matter most.
- Have the contractor use two-part spray polyurethane foam for large cavities at the sill plate and around framing, which provides both a superior air seal and an R-4 to R-6 insulation value at those spots.
- Request a post-sealing blower door test to verify the work achieved a measurable reduction in air changes per hour (ACH). A good result cuts ACH50 by 20 to 40% in an older home.
- Check whether your utility offers a rebate for air sealing work. Many utilities and state energy offices reimburse $100 to $400 of the project cost when a certified contractor performs and documents the work.
Why It Works: The Benefits
Sealing air leaks at common ant entry points can reduce heating and cooling costs by 10 to 20% annually, according to DOE data. On an average $1,800 annual energy bill, that is $180 to $360 in savings.
Physical barriers outperform chemical sprays because caulk does not degrade after rain or wear off after a few weeks. A properly applied silicone or polyurethane seal can last 10 to 20 years before reapplication is needed.
Sealing infiltration points reduces drafts near floors and baseboards, making rooms feel more even in temperature. Homeowners often notice the difference within the first heating or cooling cycle after sealing.
Gaps at pipe penetrations and the sill plate allow humid outdoor air to enter wall cavities, raising the risk of mold. Caulking these spots cuts moisture-driven condensation inside walls by reducing the volume of humid air that infiltrates.
A complete caulking kit costs $20 to $60 in materials. Combined with energy savings of $15 to $30 per month during peak heating and cooling seasons, most homeowners recover the full material cost within four to six weeks.
💰 Savings Impact by Action
Sealing the foundation sill plate joint addresses up to 25% of total home air leakage in pre-2000 construction, making it the single highest-impact caulking location.
Sealing plumbing and utility penetrations in kitchens, bathrooms, and utility rooms eliminates roughly 13% of infiltration volume in a typical home.
Re-caulking deteriorated window and door frame perimeters reduces air leakage by approximately 10 to 12% and is the most visible improvement on the exterior.
A comprehensive air sealing project addressing all major leakage sites reduces total heating and cooling energy use by 10 to 20% per DOE building performance data.
🏠 Key Concepts Explained
The Science Behind It
Ants are thermally motivated foragers. In spring and early summer, colonies send scouts searching for moisture, food, and stable temperatures. Your home offers all three, and the stack effect makes the lowest gaps in your walls actively inviting. As warm air rises and escapes through ceiling and upper-wall gaps, the pressure inside your home drops slightly below outdoor pressure at floor level, pulling outside air, and anything traveling with it, inward through every crack near the foundation.
From an energy standpoint, these same gaps represent uncontrolled infiltration, meaning air exchange you did not plan for and are paying to heat or cool. A typical unsealed home exchanges its entire air volume one to two times per hour through gaps and cracks alone. The DOE’s Building America program found that the sill plate, pipe penetrations, and window frames account for roughly 50% of that total leakage in most pre-2000 construction. Caulk and foam create a physical break in those pathways, forcing air exchange to happen only through intentional ventilation like bath fans and fresh-air intakes where you can control it.
Silicone caulk is the right choice for exterior joints because it remains flexible through thermal expansion and contraction and resists UV degradation for 10 to 20 years. Acrylic latex is better for interior painted surfaces because silicone cannot be painted over. Expanding polyurethane foam works best for irregular voids larger than about 6 mm, where caulk would sag or bridge rather than fill. Matching the right product to the right gap type is what separates a seal that lasts one season from one that lasts a decade.
Frequently Asked Questions
▼ I caulked everything I could find but ants are still getting in. What am I missing?
The most commonly missed entry points are behind the kickplate under kitchen cabinets, around the toilet base flange in bathrooms, and where the tub or shower surround meets the floor. Also check where any built-in appliances like a dishwasher or refrigerator meet the wall. Lay flat on the floor with a flashlight and look along the baseboard line, any gap that admits light also admits ants.
▼ Can renters seal their apartment without landlord permission?
Caulking interior pipe penetrations and adding a door sweep are generally considered maintenance-level improvements that most landlords permit, but confirm in writing before you start. Stick to removable or reversible products like foam tape weatherstripping along window frames, which peel off cleanly. Avoid permanent silicone on painted walls or any exterior work, which typically requires landlord approval.
▼ How long before I see savings on my energy bill?
In most homes, the effect shows up within the first full billing cycle after sealing, especially if the work is done heading into a heating or cooling season. Track your bill against the same month the prior year rather than the prior month, since seasonal variation makes month-to-month comparisons misleading. Homes with significant pre-existing leakage typically see the largest drops, sometimes 15 to 20% in the first season.
▼ My caulk is cracking and pulling away after one winter. What went wrong?
The most likely causes are applying caulk to a dirty or damp surface, using interior latex caulk in an exterior location, or applying it in cold temperatures below 40 degrees Fahrenheit. Scrape out all the failed caulk with a utility knife, clean the joint with rubbing alcohol, and reapply with a product rated for exterior use, either 100% silicone or a siliconized acrylic rated for outdoor applications.
▼ What if my home is older than 30 years?
Homes built before 1990 typically have two to three times the air leakage of modern construction, which means bigger savings potential but also more gaps to address. Focus first on the sill plate and all penetrations in the basement or crawl space, since these areas are often completely unsealed in older homes. Consider a professional blower door test to identify the high-impact locations you cannot find by visual inspection alone, since the cost is often offset by utility rebates.
Quick Tips
- Apply caulk when outdoor temperatures are between 40 and 80 degrees Fahrenheit. Caulk applied in extreme cold does not cure properly and will crack within one season.
- Clean and dry every surface before caulking. A wire brush and a quick wipe with rubbing alcohol on masonry removes the dirt and oils that cause caulk to peel away from the substrate.
- Use a backer rod (a foam rope sold at hardware stores) to pre-fill any gap wider than 12 mm before caulking over it. Caulk alone will sag or crack if it has to bridge a large void.
- Keep a spray bottle of water nearby when working with latex caulk. A quick mist on the fresh bead lets you tool it smooth with a wet finger for a clean, professional finish.
Variations for Your Situation
- Apartment/Rental: Renters cannot modify exterior walls or central HVAC, but can do most of the high-impact interior sealing. Focus on under-sink pipe gaps using removable foam backer rod, self-adhesive foam weatherstripping on window frames (under $10, peels off cleanly), and a draft stopper under exterior doors. These three steps alone can cut noticeable drafts and deter ant entry without requiring any landlord approval in most leases.
- Tight Budget (under $50): Buy one tube each of latex caulk ($5) and foam sealant ($8) and one door sweep ($12). Prioritize in this order: under-sink pipe gaps, exterior door threshold, and the joint between baseboards and the floor on any wall that faces outside. These three areas deliver the highest combined pest exclusion and energy savings per dollar spent and require no tools beyond a caulk gun.
- Older Home (pre-1980): Expect significantly more gap volume at the sill plate and around original windows. Budget for two to three cans of foam and four to six tubes of caulk rather than the minimums listed above. Check for original rope-caulk glazing on wood windows, which dries out and shrinks over decades creating large air gaps. Re-glazing compound ($6 per tube) applied to window sash joints is one of the most overlooked fixes in older homes and can seal out ants entering via the window frame.