There is nothing worse than waking up at 6 a.m. in January to a house that feels like a refrigerator. HVAC technicians report that a large share of winter no-heat calls come down to simple, preventable issues: a filter so clogged the system overheats and shuts itself down, a thermostat with dead batteries, a blocked vent, or a tripped breaker. Emergency service calls in a cold snap often cost $150 to $400 or more, and wait times can stretch for days when every other homeowner is calling too.
The good news is that most of these problems are easy to spot if you know where to look. A five-minute walk-through before heating season, and a quicker version any time the house feels off, can catch the most common failure points. It also doubles as an efficiency check, because the same issues that cause breakdowns, like restricted airflow and poor thermostat settings, quietly raise your energy bill all winter.
This post covers a simple five-minute checklist you can do today with no tools, plus a deeper 30-minute DIY upgrade that sets your system up for a reliable, efficient winter. We will also cover what to do when the checklist does not solve the problem and it is time to call a pro.
What You’ll Need
Click on an item below to shop for the recommended items for this recipe on Amazon.
As an Amazon Associate, we earn from qualifying purchases.
How to Do It
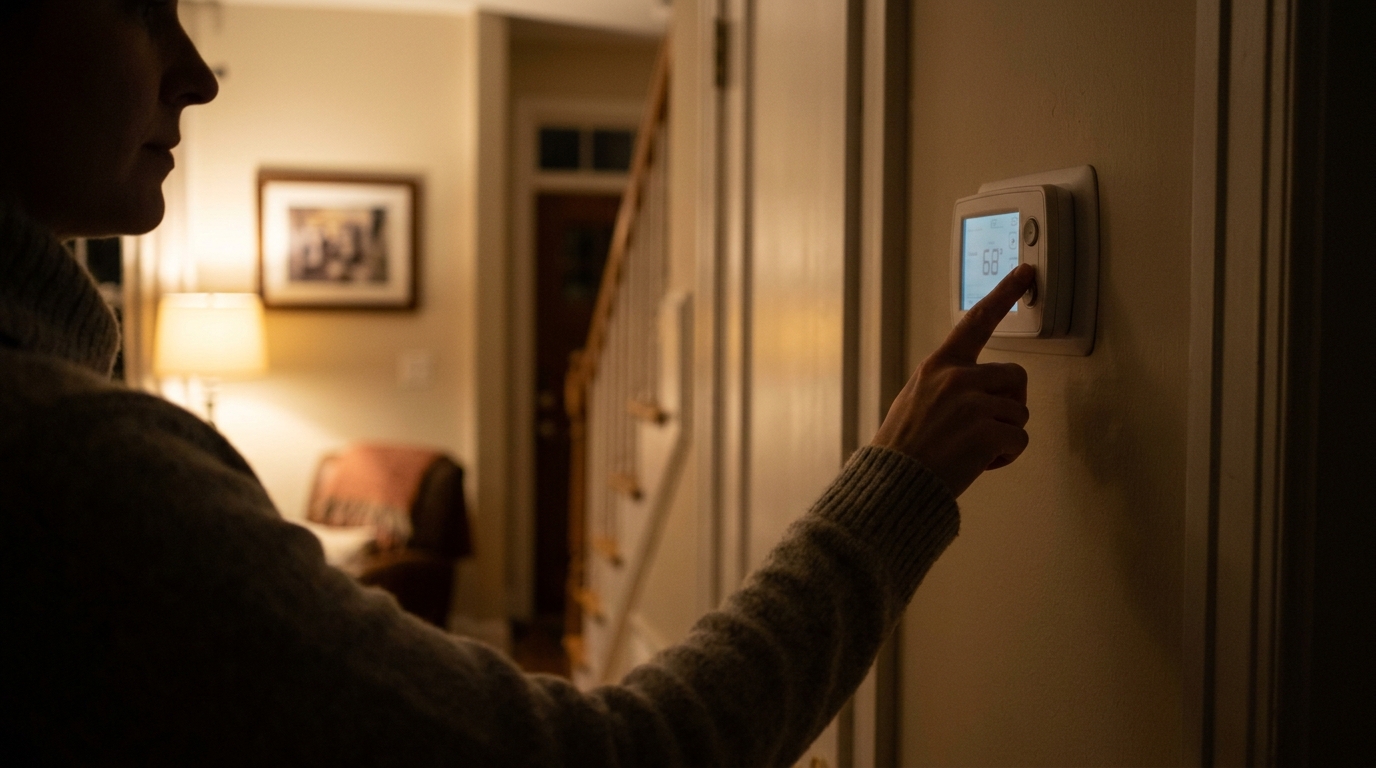
- Check your thermostat: confirm it is set to Heat, the setpoint is above the current room temperature, and the display is on. If it is dim or blank, replace the batteries.
- Look at your furnace filter by sliding it out and holding it up to a light. If you cannot see light through it or it looks gray and matted, replace it with the same size and a MERV 8 to 11 filter.
- Find the furnace service switch (it looks like a light switch on or near the unit) and confirm it is on, then check your breaker panel for a tripped furnace breaker.
- Walk each room and make sure supply registers and return grilles are open and not blocked by furniture, rugs, or curtains.
- Step outside and check that intake and exhaust vents (white PVC pipes on high-efficiency furnaces) are clear of snow, leaves, or debris, and press the test button on your carbon monoxide detector.
- Replace the furnace filter with a fresh one and write the date on the frame. Set a phone reminder to check it monthly during heating season and replace it every 1 to 3 months.
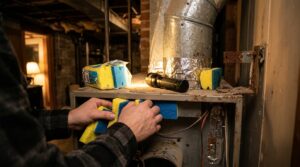
- Vacuum supply registers and return grilles, and gently vacuum around the furnace base to remove dust. Remove register covers if needed and vacuum a few inches into the duct opening.
- Run the furnace for a full cycle and listen for odd sounds like grinding, rattling, or repeated clicking without ignition. Note the time it takes for warm air to arrive, which should be about 30 to 90 seconds.
- Test your thermostat schedule: program a 7 to 10 degree overnight setback with a recovery time that starts warming the house about 30 to 60 minutes before you wake.
- Check the condensate drain on high-efficiency furnaces (a small PVC line leading to a floor drain or pump) for clogs or standing water, and make sure the condensate pump, if present, is plugged in and working.
- Test all smoke and carbon monoxide detectors, replace batteries as needed, and confirm each detector is under 7 to 10 years old.
- Schedule the visit in early fall, before the busy season, when technicians have more availability and some companies offer discounted tune-ups.
- Ask the technician to inspect the heat exchanger for cracks, test the igniter and flame sensor, check gas pressure, and measure combustion efficiency.
- Have them clean the burners and flame sensor, check the blower motor and belt, and verify that the safety shutoffs work correctly.
- Request a written report on the system’s condition and remaining life so you can plan for a replacement budget rather than facing a surprise failure.
Why It Works: The Benefits
Catching a simple issue yourself can save a $150 to $400 emergency service call, and many winter no-heat visits turn out to be a filter, battery, or breaker.
A fresh filter and unblocked airflow can reduce furnace energy use by 5 to 15%, which is roughly $50 to $150 per heating season for a typical home spending $1,000 or more on heat.
Clearing blocked registers and returns helps heat reach every room, reducing cold spots that tempt you to crank the thermostat.
A furnace running with restricted airflow endures extra strain and heat stress. Regular basic maintenance can add years to its typical 15 to 20 year lifespan.
Checking vents and testing your carbon monoxide detector takes under a minute and guards against a serious winter hazard.
💰 Savings Impact by Action
Replacing a clogged filter restores airflow and can cut furnace energy use by 5 to 15%.
Lowering the temperature 7 to 10 degrees for 8 hours daily saves up to 10% on annual heating costs.
Unblocking registers and returns improves distribution and reduces the runtime needed to heat every room.
Professional cleaning and adjustment can restore combustion efficiency and trim fuel use by roughly 5 to 10%.
Sealing leaky ducts in unconditioned spaces can recover 10 to 20% of heated air that would otherwise be lost.
🏠 Key Concepts Explained
The Science Behind It
Your furnace works by heating air and moving it through ductwork using a blower fan. When a filter clogs, the blower cannot pull enough air across the heat exchanger. Heat builds up inside the unit, and a safety device called a high-limit switch trips to prevent damage, shutting the burners off. The fan may keep running and blow cool air, which is why a clogged filter often shows up as a house that feels drafty and cold rather than a furnace that is totally silent.
Airflow restriction also hurts efficiency. A blower motor straining against a dirty filter uses more electricity, and the heat exchanger cannot transfer heat to the air as effectively. Over a season, this adds up to noticeable waste. The DOE estimates that replacing a dirty filter can lower your system’s energy use by 5 to 15%, and the longer a filter stays clogged, the more strain accumulates on the motor and heat exchanger.
Thermostat behavior matters too. Heat loss from a house is proportional to the temperature difference between inside and outside, so the lower you keep the indoor temperature while you are asleep or away, the slower heat escapes. A programmed setback of 7 to 10 degrees for 8 hours can trim about 10% from annual heating costs. The key to avoiding a cold wake-up is a recovery schedule: setting the thermostat to begin warming the house 30 to 60 minutes before you rise, so you get comfort without paying to heat an empty house all night.
Frequently Asked Questions
▼ My furnace runs but the air coming out of the vents is cold. What should I check?
First check your filter, since a clogged one can cause overheating and burner shutoff while the fan keeps blowing. Also confirm the thermostat fan setting is on Auto rather than On, because the On setting blows unheated air between heating cycles. If the filter is fresh and the problem continues, the igniter or flame sensor may need service, so call a technician.
▼ My thermostat is blank even after I replaced the batteries. What now?
Check that the furnace service switch and breaker are both on, since many thermostats are powered by a low-voltage transformer in the furnace. If power is confirmed and the screen is still blank, a blown low-voltage fuse on the furnace control board or a failed transformer is likely, and an HVAC technician can fix it quickly and inexpensively.
▼ How often should I really change my furnace filter?
A basic 1-inch filter generally needs replacing every 1 to 3 months during heating season, while thicker 4 to 5 inch media filters can last 6 to 12 months. Homes with pets, smokers, construction dust, or allergy sufferers should check monthly. When in doubt, hold the filter up to a light, and if you cannot see through it, replace it.
▼ Is it worth paying for a professional tune-up if everything seems fine?
For furnaces over 10 years old or any gas-fired unit, yes, because a technician can spot cracked heat exchangers, failing igniters, and carbon monoxide risks you cannot see. A $80 to $200 visit can prevent a mid-winter failure, and it is often required to keep manufacturer warranties valid.
▼ The house is still cold even though the furnace is running constantly. Is something wrong?
A furnace that runs nonstop usually points to heat loss or capacity issues rather than a simple fault. Check for open windows or doors, blocked vents, and a dirty filter first. If those are fine, drafts, poor insulation, or an undersized or aging system may be the cause, and a home energy audit (often $100 to $400, sometimes subsidized by utilities) can pinpoint the problem.
Quick Tips
- Set a recurring phone reminder on the first of every month during heating season to glance at your furnace filter. Replace it if it looks gray, and at minimum every 3 months.
- Keep at least 2 feet of clear space around your furnace and 12 inches around supply registers so air and combustion can flow freely.
- Replace thermostat batteries once a year when you change your clocks in the fall, even if the display still works.
- Test your carbon monoxide detector monthly and replace the unit every 5 to 7 years, or as the manufacturer recommends.
- Program your thermostat to start warming the house 30 to 60 minutes before you wake rather than raising it manually when you are already cold.
Variations for Your Situation
- Apartment/Rental: You likely cannot touch the central furnace, but you can still check your thermostat batteries, keep supply and return vents unblocked, and report a dirty filter or odd noises to your landlord in writing. A $15 to $30 plug-in carbon monoxide detector and a battery-powered backup thermostat if allowed add a layer of safety for very little cost.
- Tight Budget (under $50): Focus on the free and cheap essentials: swap the thermostat batteries ($3 to $5), replace the filter ($5 to $15), clear every vent and register, and program a smart setback schedule. These steps alone deliver most of the efficiency gains and prevent the most common no-heat failures.
- Older Home (pre-1980): Older houses often have leaky ductwork, undersized returns, and furnaces nearing end of life, so give extra attention to airflow and consider a professional inspection ($80 to $200) to check the heat exchanger and gas connections. Sealing visible duct joints with foil tape or mastic (about $10 to $20) can recover 10 to 20% of lost heat in unconditioned spaces like attics and crawlspaces.