You finally finished the basement, and now it sits at 80 degrees all summer while the rest of the house feels fine. Sound familiar? Converted basement spaces present a unique cooling challenge: they’re often isolated from the home’s central duct system, they gain heat through above-grade walls exposed to summer sun, and they tend to trap humid air that makes even moderate temperatures feel oppressive. Most HVAC contractors will quote $3,000 to $8,000 to extend existing ductwork down there, and that assumes your system even has the spare capacity to handle the extra load.
The good news is that modern ductless technology, strategic ventilation, and targeted cooling equipment have made it completely practical to cool a finished basement comfortably without tearing into walls or running new duct lines. Homeowners are increasingly turning to mini-split systems, portable air conditioners, and smart airflow techniques that together deliver real comfort at a fraction of the traditional cost.
This guide walks you through every realistic option, from a zero-cost ventilation adjustment you can do in the next 15 minutes to a DIY mini-split installation that pays for itself in three to four years. You’ll get real numbers on energy use, payback periods, and what to watch out for so you can choose the approach that fits your budget and your basement.
What You’ll Need
Click on an item below to shop for the recommended items for this recipe on Amazon.
As an Amazon Associate, we earn from qualifying purchases.
How to Do It
- Close all basement windows and exterior doors during the day to block warm, humid outdoor air. Open them only after 10 PM when outside temperatures drop below indoor basement temperature.
- Check whether any central HVAC supply registers exist in the basement. If so, fully open them and close one or two registers on upper floors to redirect more airflow downward.
- Place a box fan at the top of the basement stairs facing down to push already-cooled air from the main floor into the basement. A 20-inch box fan moves 2,500 CFM and costs about $1.50 per month to run continuously.
- Run a dehumidifier set to 50% relative humidity. Dropping humidity from 70% to 50% makes the space feel 4 to 6 degrees cooler without any mechanical cooling.
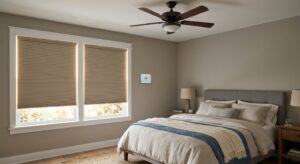
- Cover any above-grade basement windows on the south and west sides with reflective window film or cellular shades to block solar gain, which can add 1,000 to 1,500 BTU of heat load per window per hour.
- Measure your basement square footage and ceiling height. Multiply length by width by height in feet, then divide by 1,000 to get a rough BTU estimate. Add 10% for poor insulation. A 500 sq ft basement with 8-foot ceilings needs roughly 12,000 to 14,000 BTU.
- Choose a dual-hose portable AC (one hose draws outdoor air for cooling the condenser, one exhausts heat). This prevents the unit from depressurizing the space and pulling hot air in through cracks.
- Locate the best venting point. A small basement window works well. If no window exists, drill a 5-inch hole through the rim joist above the foundation and install a louvered vent cap for about $12.
- Install the window venting kit included with the unit, sealing any gaps around the hoses with foam weatherstripping tape. Gaps reduce efficiency by 15 to 20% and let humid outdoor air back in.
- Set the unit to 72 to 74 degrees and run in AUTO mode. Use a timer or smart plug to run the unit only during occupied hours, targeting roughly 8 hours per day rather than 24-hour operation.
- Empty the condensate tray every 24 to 48 hours, or route a drain hose to a floor drain if available. A 12,000 BTU unit removes 30 to 50 pints of water per day in a humid basement.
- Select a 9,000 or 12,000 BTU single-zone mini-split for most finished basements up to 550 square feet. Look for a SEER2 rating above 18 and an inverter compressor for maximum efficiency.
- Mount the indoor air handler on an interior wall at least 7 feet from the floor, away from direct sunlight and corners. Use a stud finder to locate solid framing and attach the mounting bracket with lag screws into studs.
- Drill a 3-inch hole through the rim joist or exterior basement wall at a slight downward angle toward the outside. This single hole carries the refrigerant line set, electrical wiring, and condensate drain.
- Feed the pre-charged line set and wiring through the wall sleeve. Connect the quick-connect fittings on the line set without tools: the fittings click together and self-seal. Route the condensate drain to slope at least 1/4 inch per foot toward a floor drain or condensate pump.
- Mount the outdoor condenser unit on a flat concrete pad or wall brackets at least 12 inches off the ground and away from dryer vents or landscaping that could block airflow. Keep at least 18 inches of clearance on all sides.
- Connect the electrical supply. A 9,000 BTU unit typically requires a dedicated 15-amp 240V circuit. Have a licensed electrician run this circuit if you are not comfortable with panel work. Turn on the system and verify cooling mode works before sealing the wall penetration with foam backer rod and caulk.
Why It Works: The Benefits
Extending central HVAC ductwork to a basement typically costs $3,000 to $8,000 in labor and materials, and may require upgrading your air handler. A DIY mini-split or portable AC delivers real cooling for $700 to $2,500 installed.
A ductless system lets you set the basement at 72 degrees without overcooling the upstairs. This zoned approach typically saves 15 to 25% on total cooling costs compared to running central AC to serve all zones at once.
Mini-splits and quality portable ACs remove 50 to 100 pints of moisture per day, keeping relative humidity below the 60% threshold where mold and dust mites thrive. This directly improves air quality for anyone sleeping or working in the basement.
Modern mini-split systems carry SEER2 ratings of 18 to 26, compared to 14 to 18 for most central systems. That efficiency gap translates to 20 to 40% less electricity used per BTU of cooling delivered.
Portable AC units require only a window or a small wall sleeve. DIY mini-split kits require one 3-inch hole through the rim joist or exterior wall. Neither option requires opening ceilings, framing soffits, or hiring a general contractor.
💰 Savings Impact by Action
Sealing the uninsulated rim joist with rigid foam and spray foam reduces basement heat and humidity infiltration by 15 to 25%, directly cutting cooling runtime.
A SEER2 20 mini-split uses 35 to 40% less electricity per BTU of cooling than extending a SEER 14 central system with additional duct runs.
Reducing relative humidity from 70% to 50% makes occupants comfortable at temperatures 4 to 6 degrees warmer, cutting mechanical cooling runtime by 10 to 15%.
Cooling only the occupied basement zone rather than running central AC for the whole home saves 15 to 20% on total summer cooling costs.
Applying reflective window film or cellular shades to above-grade basement windows cuts solar heat gain by 50 to 70%, reducing peak cooling load by 5 to 10%.
🏠 Key Concepts Explained
The Science Behind It
Basements feel uncomfortable in summer for two overlapping reasons: sensible heat gain and latent heat gain. Sensible heat is the temperature you measure with a thermometer. Latent heat is the energy stored in water vapor. When warm, humid outdoor air enters a cool basement, it releases that stored moisture, raising the dew point and creating the clammy feeling that makes 72 degrees feel like 78. Any cooling strategy that ignores moisture is only solving half the problem.
The stack effect makes this worse. As warm air rises through the home and escapes through upper floors, it creates a slight negative pressure in the basement that actively pulls outdoor air in through every crack, gap around pipes, and window frame. A typical unsealed basement exchanges air with the outdoors at a rate of 0.5 to 1.5 air changes per hour, meaning the entire volume of basement air is replaced with outdoor air once every one to two hours all summer long. This is why sealing before cooling is so critical: every BTU removed by your cooling equipment is offset by warm, humid replacement air if the envelope leaks.
Ductless mini-splits address this physics particularly well. Because the refrigerant circuit runs directly to the indoor unit without duct losses, these systems deliver nearly 100% of their rated BTU capacity to the conditioned space. A 12,000 BTU central system might deliver only 9,000 BTU to the basement after accounting for duct leakage, pressure drop, and distribution losses. The mini-split delivers all 12,000 BTU with a higher SEER2 rating on top of that. Over a 1,000-hour cooling season, that efficiency gap saves 150 to 300 kWh, or $18 to $36 per year at average US electricity rates, compounding every year the equipment runs.
Frequently Asked Questions
▼ My portable AC runs constantly but the basement never gets below 76 degrees. What is wrong?
This almost always means the unit is undersized for the actual heat load, or warm air is flooding back in through gaps around the exhaust hose and vent kit. First, seal every gap around the window vent kit with foam tape. Then calculate your true heat load: square footage times 25 BTU per square foot is a starting rule of thumb, plus 1,000 BTU for each above-grade window. If your unit is more than 15% undersized, a second unit or an upgrade to a larger capacity model will solve the problem more efficiently than running the undersized one 24 hours a day.
▼ Can I just redirect more airflow from my existing central AC down to the basement?
You can partially, by opening existing basement registers and throttling upstairs registers, but this only works if your air handler has enough capacity and static pressure to push air that far through the duct system. Most systems sized for a two-story home are already running near their design load in summer. Adding a basement zone without re-engineering the duct system typically reduces comfort upstairs without fully solving the basement problem. The most reliable way to confirm available capacity is to have an HVAC technician perform a Manual J load calculation on your system.
▼ Will a mini-split installation void my homeowner’s insurance or require a permit?
Permit requirements vary by municipality. Most jurisdictions require a mechanical permit for a new cooling appliance and an electrical permit for the new circuit. DIY mini-split kits like Mr. Cool DIY are specifically designed to be homeowner-installed in states where this is allowed, but you should still pull the appropriate permits. Unpermitted work can complicate home sales and insurance claims. Call your local building department before starting: the permit typically costs $50 to $150 and inspection is usually a one-hour visit.
▼ My basement smells musty even after I installed a dehumidifier. Will cooling help?
Musty odor is a sign of active mold or mildew growth, which means moisture levels were high enough for long enough to allow biological growth on surfaces. Cooling and dehumidifying will prevent future growth, but they will not remove existing mold. Before investing in a cooling system, clean visible mold with a 1:10 bleach-to-water solution, allow surfaces to dry thoroughly, and identify the moisture source (condensation, groundwater intrusion, or vapor diffusion through walls). If mold covers more than 10 square feet, EPA guidelines recommend hiring a licensed mold remediation contractor.
▼ How long does it realistically take to see savings on my energy bill after installing a mini-split?
You will see the first reduced bill within 30 to 60 days of installation, since you are replacing either no cooling (and gaining comfort) or supplemental window units that typically have SEER ratings of 10 to 12. A mini-split at SEER2 20 uses 40 to 50% less electricity per BTU than an older window unit. On a $120 summer cooling bill, that saves $48 to $60 per month. A $1,500 DIY mini-split installation typically reaches full payback in 3 to 4 cooling seasons under average US electricity rates.
Quick Tips
- Set your mini-split or portable AC to dehumidification mode (dry mode) on mild days when temperature is acceptable but humidity is high. This removes moisture using far less energy than full cooling mode.
- Install a $25 temperature and humidity sensor in the basement and connect it to a smart plug on your portable AC. Automate the AC to run only when both temperature exceeds 74 degrees and humidity exceeds 55%, cutting runtime by 20 to 35%.
- Paint above-grade basement walls with a light-colored, vapor-resistant paint before installing cooling equipment. Light colors reflect radiant heat from the sun-warmed foundation, reducing sensible heat gain by 5 to 10%.
- If you use a portable AC, insulate the exhaust hose with pipe insulation or a foam sleeve. An uninsulated exhaust hose radiates heat back into the room it is trying to cool, reducing effective capacity by up to 10%.
Variations for Your Situation
- Apartment or Rental Basement: If you cannot install a mini-split or cut through walls, a dual-hose portable AC vented through a sliding window kit is your best option and requires zero permanent modification. Look for units by Whynter or De’Longhi in the 12,000 to 14,000 BTU range ($400 to $650). Pair it with a standalone dehumidifier set to 50% RH. Total investment stays under $800 and everything moves out with you.
- Tight Budget Under $200: Start with the zero-cost ventilation adjustments (closing windows during the day, redirecting existing registers, running a box fan at the stair opening). Add a $25 to $50 roll of reflective bubble insulation on the rim joist to block the largest infiltration zone. If a dehumidifier is already present, optimize its placement to center of the space and empty it daily. These steps alone can reduce perceived temperature by 4 to 6 degrees in a moderately leaky basement.
- Older Home Pre-1980: Basements in pre-1980 homes typically have uninsulated rim joists, no vapor barrier on the slab, and single-pane glass block or jalousie windows that leak badly. Before any cooling equipment goes in, install 2-inch polyisocyanurate rigid foam on the rim joist ($0.50 to $1.00 per linear foot), seal the slab perimeter with hydraulic cement, and cover glass block windows with insulating inserts. These envelope improvements reduce the cooling load by 20 to 30%, allowing you to use a smaller, less expensive cooling unit and improving payback to 2 to 3 years.