Every time the furnace or AC kicks on, there it is: a high-pitched squeal, a metallic rattle, or a ticking sound from the floor vent near the couch. Most people learn to ignore it, or they stuff a folded paper towel in the gap and hope for the best. The noise is not just irritating. It is often a sign that the register is loose, the damper blade is vibrating in the airstream, or the vent has pulled away from the duct opening below it.
That last part matters for your energy bill. A register that does not sit tight against the floor and boot (the sheet metal collar that connects the vent to the duct) can leak conditioned air into the floor cavity. The Department of Energy estimates that typical homes lose 20 to 30 percent of the air moving through ductwork to leaks, holes, and poorly connected sections. A loose vent is a tiny piece of that puzzle, but it is also one of the easiest pieces to fix.
In this post, you will learn how to find out why your vent is making noise, fix it in about five minutes with household items, and take it a step further with a more durable DIY repair. We will also cover when the noise points to a bigger duct problem that deserves a closer look.
What You’ll Need
Click on an item below to shop for the recommended items for this recipe on Amazon.
As an Amazon Associate, we earn from qualifying purchases.
How to Do It
- Turn off your HVAC system at the thermostat so the vent is not blowing while you work.
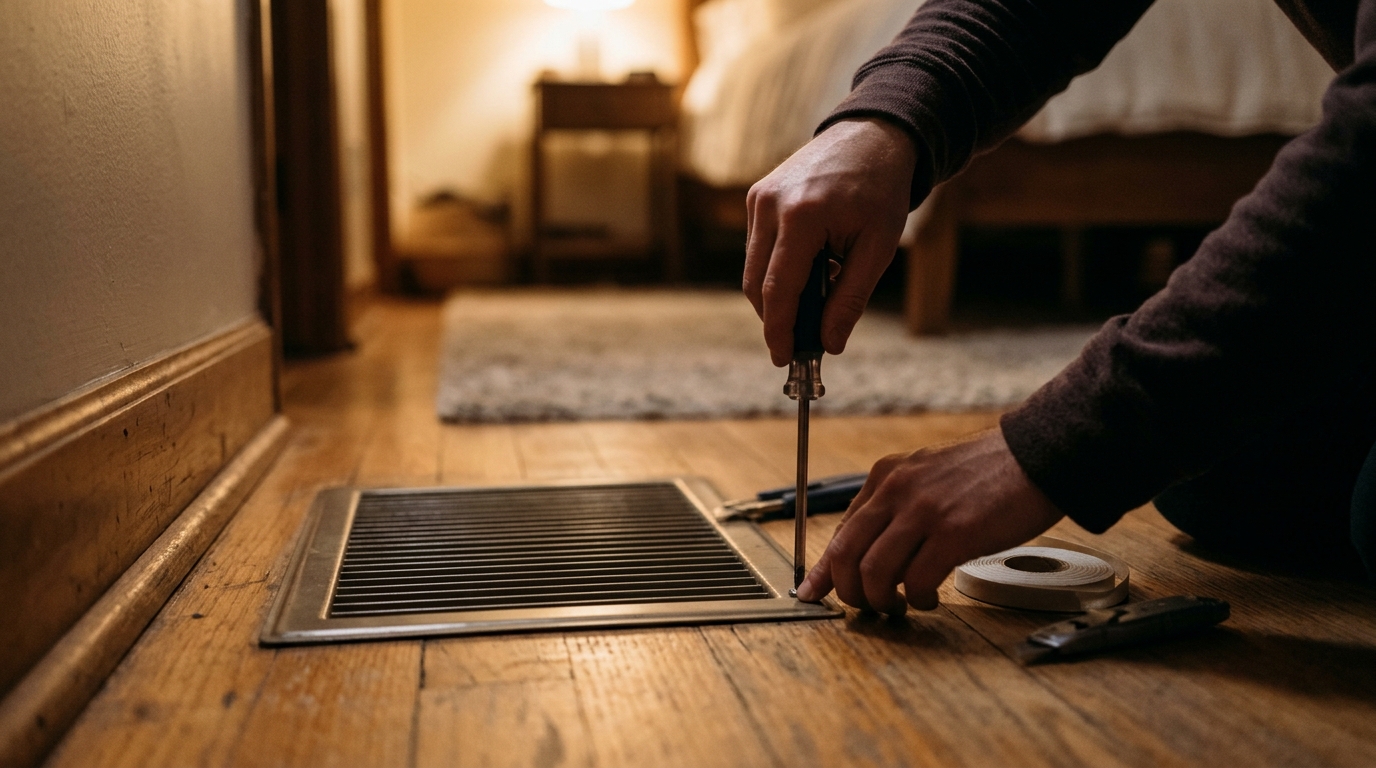
- Remove the register by lifting it out or unscrewing the one or two screws holding it down.
- Check the screws and tabs. Tighten any loose screws, and gently bend any loose metal tabs back into position with your fingers.
- Look at the damper blade. If it flaps freely, push the pivot pins back into their slots or bend the blade slightly so it fits snugly.
- Place a thin strip of weatherstripping or a few small felt furniture pads on the underside of the register’s flange so it sits snug against the floor.
- Set the register back in place, turn the system on, and listen. If the squeak is gone, you are done.
- Turn off the HVAC system and remove the register.
- Vacuum out the boot opening and wipe the area with a damp rag so tape and sealant can bond to clean metal.
- Inspect the gap between the boot and the floor. If it is larger than about 1/8 inch, apply a thin bead of paintable caulk or foil tape around the edge of the boot to seal it.
- If the boot wobbles, drive a 1-1/4 inch sheet metal screw through the boot flange into the subfloor to lock it in place.
- Apply self-adhesive foam weatherstripping around the underside of the register flange for a snug, vibration-free seal.
- Lubricate the damper pivot with a drop of light machine oil or silicone spray, then reinstall the register and test the airflow by hand.
Why It Works: The Benefits
Eliminating vent rattle and whistle can drop perceived HVAC noise noticeably, especially in bedrooms where even a 5 to 10 decibel reduction helps sleep.
Sealing the gap around a loose register can recover a small share of the 20 to 30 percent of duct airflow the DOE says typical homes lose to leaks.
A properly seated register with a clean, correctly adjusted damper delivers air where you want it instead of letting it spill into the floor cavity.
A tight register keeps dust, pet hair, and debris from falling into the duct opening, which helps protect your system and indoor air quality.
Most fixes use items you already own, and even the upgraded repair typically runs under $15.
💰 Savings Impact by Action
Sealing the gap around a loose register can recover 1 to 3 percent of conditioned air that would otherwise leak into the floor cavity.
Properly seating and cushioning a loose register eliminates most vibration noise, often 80 percent or more of the audible rattle.
Cleaning the louvers and resetting the damper can improve airflow to the room by around 10 percent when the vent was partly blocked.
Repeating this fix and sealing other accessible duct joints can cut duct leakage by up to 20 percent, per DOE estimates for typical homes.
🏠 Key Concepts Explained
The Science Behind It
Squeaks and rattles come from vibration. When air moves through a duct at several hundred feet per minute, it creates turbulence at every edge and obstruction, including the louvers and damper blade of a floor register. If any of those parts are loose, they resonate at a frequency set by their size and stiffness, producing a whistle, buzz, or tick. Adding mass or friction, such as weatherstripping or felt pads, dampens that vibration and shifts the resonance out of the audible range.
The energy side of the story is about pressure. Supply ducts run at positive pressure, which means any gap pushes conditioned air out into unconditioned space. Lawrence Berkeley National Laboratory research has found that typical duct systems leak enough air to increase heating and cooling energy use by 10 to 30 percent across the whole system. A loose register is only one of many leak points, but it is one of the most accessible, and sealing the boot-to-floor gap keeps air flowing into the room where you actually want it.
It also helps to remember that sound and leakage often travel together. A vent that rattles because it is not seated properly is usually also a vent that is not sealed properly. Fixing the mechanical issue tends to fix the airflow issue at the same time, which is why a five-minute repair can quietly pay you back every month.
Frequently Asked Questions
▼ Why does my floor vent still whistle after I tightened it?
A persistent whistle usually means air is being forced through a restriction, such as a partly closed damper, a dirty louver, or an undersized register. Open the damper fully, vacuum out the vent, and check that nothing is blocking the boot. If every vent whistles, your system may have high static pressure, and a dirty filter is the first thing to replace.
▼ Can I fix a squeaky vent if I rent my home?
Yes, in most cases. Tightening screws, adding felt pads, and applying removable foam weatherstripping are all non-permanent and reversible. Skip the caulk and screws into the subfloor unless your landlord approves, and report any damaged boot or duct to maintenance.
▼ How long before I notice savings on my energy bill?
The noise is gone immediately, but the energy savings from sealing one vent are small, typically 1 to 3 percent of heating and cooling costs at most. You will see more noticeable results if you repeat the repair across several vents and pair it with sealing other visible duct gaps.
▼ What if my home is older than 30 years?
Older homes often have loose, warped, or painted-over registers and boots that have shifted over decades. Expect to spend a little more time cleaning and re-seating the boot, and consider replacing very old registers. If the ducts themselves are rusted through or poorly connected, a professional duct inspection and sealing job (often $400 to $1,500) can deliver larger savings.
▼ Why does the vent only squeak when the AC or heat first turns on?
That is thermal expansion at work. The metal heats or cools quickly and shifts slightly, which makes a loose part tick or pop. Tightening the screws and adding a thin layer of weatherstripping under the register flange usually stops it.
Quick Tips
- Fix the noise in the same session that you clean the vent. A vacuum and a damp rag take two extra minutes and improve airflow.
- Do not use a thick wad of paper or fabric under the register. It can restrict airflow and become a fire hazard near heat sources.
- Check every register in the house while you are at it. Loose vents tend to come in groups.
- Replace bent, rusty, or warped registers. A new stamped steel or aluminum floor register costs about $5 to $12 and fits snugly out of the box.
- Close the damper partway only if the room is over-conditioned, and do not close more than a few vents in total. Restricting too many can raise static pressure and make noise worse.
Variations for Your Situation
- Apartment/Rental: Stick to reversible fixes. Use self-adhesive foam weatherstripping ($5 to $8 per roll) under the register flange and felt furniture pads on the contact points. Avoid screws into the floor, and ask maintenance to inspect the boot if it is bent or detached.
- Tight Budget (under $50): Skip the store run. Use a few felt pads or a strip of old weatherstripping to cushion the register, tighten any loose screws, and use a drop of cooking oil or silicone spray on the damper pivot. Total cost is usually $0 to $3.
- Older Home (pre-1980): Expect brittle paint, stiff dampers, and boots that have shifted over time. Clean off paint buildup with a plastic scraper, replace worn registers ($8 to $15 each), and seal any gap larger than 1/8 inch around the boot with foil tape or paintable caulk. Consider a professional duct leakage test if your energy bills seem high.