Every winter, roughly 250,000 American homes suffer burst pipes, with the average insurance claim running between $5,000 and $70,000 once you factor in water damage, drywall repairs, and lost belongings. The cruel irony is that the prevention costs less than a nice dinner out. A few hours spent on a mild fall weekend can mean the difference between a cozy winter and a flooded basement in January.
Pipes freeze when the water inside them drops to 32°F, but the real damage happens when ice expands and splits the pipe wall. Even a tiny quarter-inch crack in a copper pipe can release up to 250 gallons of water per day. The pipes most at risk are those running through unheated spaces like crawl spaces, garages, exterior walls, and attics, where temperatures can plummet far below what your thermostat reads inside.
This guide walks you through everything from a 20-minute free fix to a full DIY insulation project, so you can match the solution to your home and your budget. Whether you rent an apartment or own a 100-year-old farmhouse, there is a practical approach here that will keep water flowing and your walls dry all season long.
What You’ll Need
Click on an item below to shop for the recommended items for this recipe on Amazon.
As an Amazon Associate, we earn from qualifying purchases.
How to Do It
- Open cabinet doors under sinks on exterior walls in kitchens and bathrooms so warm indoor air can circulate around the pipes inside the cabinet.
- Let the cold-water faucet on any pipe that runs through an exterior wall drip slowly at about one drip per second. Moving water resists freezing and relieves pressure if ice does begin to form.
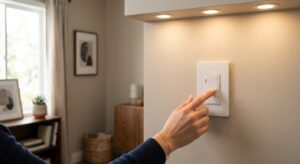
- Set your thermostat no lower than 55°F, even when you leave for vacation. The few extra dollars in heating costs are negligible compared to the cost of a burst pipe.
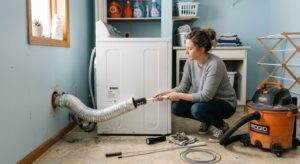
- Disconnect and drain all outdoor garden hoses completely. Water left in a connected hose backs pressure up into the spigot valve inside the wall and can crack it.
- Locate your main water shut-off valve now, before an emergency. If a pipe bursts, turning this off within the first minute limits damage to just a few gallons instead of hundreds.
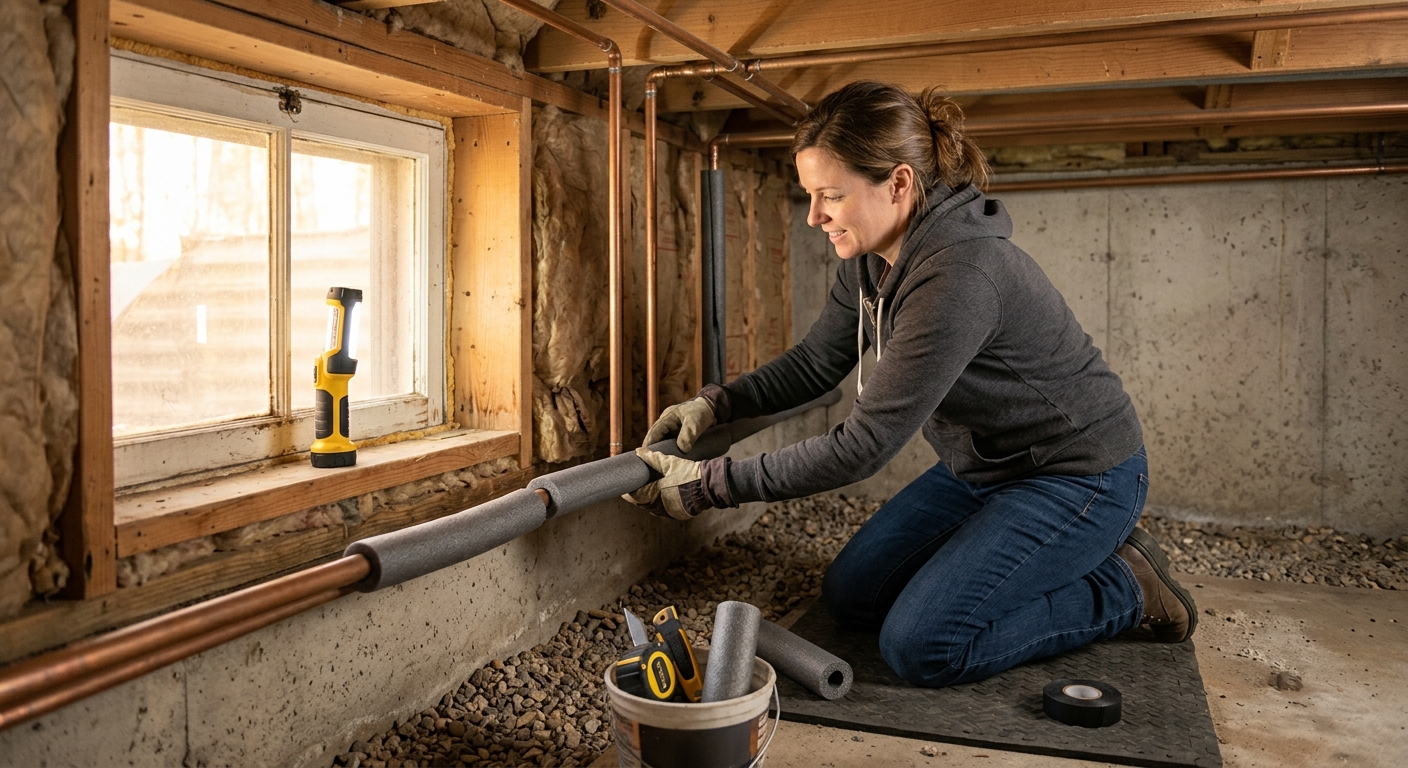
- Walk your home and identify every pipe running through unheated spaces: crawl spaces, the garage, the attic, and any exterior wall where you can access the pipe. Note the pipe diameter so you buy the right size foam sleeve.
- Purchase pre-slit foam pipe insulation sleeves sized to match your pipe diameter, typically half-inch or three-quarter-inch for most residential supply lines. Buy enough to cover all vulnerable runs plus 10% extra for overlaps.
- Wrap all crawl space vents with foam vent covers or rigid foam board cut to fit before temperatures drop below 20°F. This reduces wind chill on pipes dramatically without permanently sealing the crawl space.
- Slide foam pipe insulation sleeves over each vulnerable pipe, pressing the pre-slit seam closed. Overlap sleeve joints by at least two inches and secure every 12 inches with acrylic tape designed for insulation to prevent gaps.
- Seal any air gaps or penetrations where pipes pass through exterior walls or rim joists using low-expansion spray foam or fire-rated caulk. Cold air infiltrating at these points is often the actual cause of freezing even when the pipe appears insulated.
- For pipes in extremely exposed areas like a detached garage or a poorly insulated crawl space, install self-regulating electric heat cable rated for the pipe length, following the manufacturer’s instructions for wrapping and thermostat setup. These cables draw only 3 to 12 watts per foot and activate automatically when pipe temperature approaches 38°F.
- Hire a licensed plumber to reroute pipes that run through exterior wall cavities to interior wall paths where possible. This is the most permanent solution and eliminates the risk entirely for those lines.
- Have a plumber install a whole-house automatic water shut-off valve with a leak sensor. These devices, costing $200 to $500 installed, detect flow anomalies from a burst pipe and shut off the main in seconds, limiting damage to minimal water.
- Commission an insulation contractor to add spray foam or dense-pack insulation to exterior wall cavities and rim joists during a renovation. Bringing these assemblies to R-15 or higher dramatically reduces freeze risk for any pipes in those walls.
- Ask your plumber about replacing older galvanized or rigid copper pipes in high-risk locations with PEX tubing. PEX is flexible and can expand slightly when ice forms, making it significantly more freeze-resistant than rigid pipe materials.
Why It Works: The Benefits
A single burst pipe can release 250 gallons per day. The average insurance claim for pipe-related water damage is $11,000, and many homeowners face deductibles of $1,000 to $2,500 before coverage even kicks in.
Insulating pipes in crawl spaces and basements also reduces heat loss from hot water lines by 2 to 4 degrees F per foot of uninsulated pipe, which cuts water heating energy use by up to 4% annually according to the U.S. Department of Energy.
Insulated hot water pipes retain heat longer between uses, meaning you wait less time for hot water at the tap, which also reduces water waste by 10 to 15 gallons per day in a typical household.
Many insurers track claims history, and a single water damage claim can raise your annual premium by 20 to 40% for three to five years. Prevention avoids the claim entirely and keeps your rate stable.
Properly insulated and protected pipes allow you to travel during the holidays or sleep through a polar vortex without worrying about returning to a flooded home or waking up to no running water.
💰 Savings Impact by Action
Insulating hot water pipes in unheated spaces reduces standby heat loss and cuts water heating energy use by 2 to 4% annually according to the U.S. Department of Energy.
Sealing crawl space vents and rim joists reduces cold air infiltration, which can lower overall heating load by 10 to 15% in homes with vented crawl spaces.
A single prevented burst pipe avoids an average insurance claim of $11,000, representing a complete return on a $40 to $120 insulation investment in one event.
Keeping the thermostat at 55 to 60°F instead of 45°F while away costs roughly 3% more in heating energy but eliminates the largest single cause of vacation-related pipe freezing.
🏠 Key Concepts Explained
The Science Behind It
Pipes freeze through a straightforward but fast process of conductive and convective heat loss. Water in a pipe continuously exchanges heat with the surrounding air and building materials. In a heated interior wall, the air temperature around the pipe stays well above freezing, so this heat exchange is slow and harmless. But in a crawl space where outdoor air infiltrates through vents and gaps, the pipe surface can be surrounded by air at 15 or 20°F, and heat bleeds out of the water rapidly. Once the water temperature at the pipe wall reaches 32°F, ice crystals begin nucleating on the interior surface and grow inward.
The real danger is not the ice itself but the pressure it creates. Ice is less dense than liquid water, so as the frozen plug grows, it tries to expand in all directions. In a sealed pipe section with no room to expand, this creates internal pressures that can exceed 2,000 psi, which is roughly 40 times the normal operating pressure of a home plumbing system. The pipe does not always fail at the ice plug itself. Often the pressure wave travels to a fitting, a solder joint, or a spot where the pipe wall is slightly thinner, and that is where the crack appears, sometimes several feet away from where the ice formed.
Insulation works by slowing the rate of heat transfer between the water and the cold air, buying time for the ambient temperature to rise before the pipe reaches the critical threshold. A half-inch foam sleeve with an R-value of about R-3 to R-4 does not eliminate heat loss, but it slows it enough that a brief cold snap overnight will not drop water temperature to freezing before morning warmth returns. Sealing air leaks around pipes addresses convective heat loss, which is often faster and more damaging than simple conductive loss through the wall assembly, making air sealing just as important as adding insulation thickness.
Frequently Asked Questions
▼ My pipe is already frozen. What do I do right now?
Turn off the main water supply valve immediately before attempting to thaw anything, because if the pipe has already cracked, restoring flow will cause flooding. Use a hair dryer on low heat or a warm towel wrapped around the pipe to gently thaw the section, starting closest to the faucet and working back. Never use an open flame. Once thawed, turn the water back on slowly and watch the pipe closely for 10 minutes before leaving it unattended.
▼ How do I find pipes that are at risk in my house?
Start by going to your basement or crawl space with a flashlight and following the supply lines from your water meter outward. Any pipe that passes through an exterior wall, runs along an exterior foundation wall, or travels through an unheated garage or attic is at risk. Pay special attention to the kitchen sink on an exterior wall and any bathroom on the north or east side of the house, as these are the most commonly frozen locations.
▼ I rent an apartment. Can I do anything to prevent frozen pipes?
Yes, and the free steps are the most important ones. Keep cabinet doors under exterior-wall sinks open, never set your heat below 60°F even when away, and disconnect any hose from an outdoor spigot. If you have a cold snap coming and you are concerned about a specific pipe, notify your landlord in writing immediately so they are on the hook for any damage. Document the notification with a text or email.
▼ Will homeowner’s insurance cover a burst pipe from freezing?
Most standard homeowner’s insurance policies cover sudden and accidental water damage from a burst frozen pipe, but they typically exclude damage caused by negligence, such as turning the heat off completely while away on vacation. Coverage usually includes water damage remediation and structural repairs but not the plumbing repair itself. Review your policy’s water damage exclusions and deductible before winter, not after.
▼ I insulated my pipes last year and one still froze. What did I miss?
The most common culprit is an air leak, not inadequate insulation thickness. Cold air infiltrating at a gap around a pipe penetration, a foundation crack, or an open crawl space vent can overwhelm even a well-insulated pipe by keeping the surrounding air temperature near freezing for hours. Go back and audit every point where pipes pass through framing or foundation walls and seal any gaps with spray foam or fire-rated caulk.
Quick Tips
- Know your home’s freeze threshold: most exposed pipes become vulnerable when outdoor temperatures stay below 20°F for more than six consecutive hours, especially with wind.
- Insulate both hot and cold water lines in unheated spaces. Hot water pipes can freeze too, and insulating them also cuts your water heating costs by retaining heat between uses.
- Take a photo of where your main shut-off valve is located and share it with everyone in your household. In a burst-pipe emergency, finding it in 10 seconds instead of 10 minutes makes an enormous difference.
- If you leave for vacation in winter, ask a neighbor to check your home every 48 hours and leave your thermostat at 60°F minimum rather than dropping it to 55°F. A slightly higher setting costs roughly $2 to $4 more per day but provides a meaningful buffer against sudden cold snaps.
Variations for Your Situation
- Apartment/Rental: Renters cannot modify plumbing or add permanent insulation, but the free steps are still highly effective. Keep kitchen and bathroom sink cabinet doors open during cold snaps, maintain indoor temperature at 60°F or above at all times, and place a portable space heater set to 50°F near any suspect exterior-wall pipe area like under a kitchen sink. Notify your landlord in writing of any draft or cold spot near pipes so the responsibility for prevention is clearly documented.
- Tight Budget (under $50): Focus first on the free behavioral changes: open cabinet doors, drip faucets on cold nights, and disconnect hoses. With $20 to $30, buy foam pipe sleeves for the three to five most exposed pipe runs you can access, prioritizing the crawl space and any garage water lines. A $10 foam vent cover kit for crawl space vents delivers outsized protection by dramatically cutting wind chill on pipes below the house.
- Older Home (pre-1980): Homes built before modern energy codes often have supply lines running directly against exterior sheathing inside poorly insulated wall cavities, a very high-risk configuration. In addition to insulating accessible pipes, have a plumber assess whether any lines can be rerouted to interior walls during your next renovation. Prioritize sealing the rim joist and crawl space air leaks, as older homes typically leak three to five times more air than newer construction, which is the primary driver of pipe freezing in these buildings.