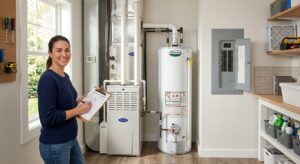
Every winter, roughly 250,000 American homes suffer burst pipes, according to the Insurance Institute for Business and Home Safety. The culprit is almost always the same: pipes running through unheated spaces like crawl spaces, exterior walls, garages, and attics that drop below 32 degrees Fahrenheit. In a poorly insulated home, those temperatures can be reached quickly, and the expanding ice inside the pipe does not care how old your plumbing is or how new your water heater is.
What makes frozen pipes so costly is not the freeze itself but the thaw. A single crack in a copper or PVC pipe can release 250 gallons of water per hour. By the time most homeowners notice, ceilings have collapsed, flooring is ruined, and mold has already begun forming in wall cavities. Homeowners insurance often covers the damage but rarely the root cause, leaving you to solve the same problem again next winter.
This guide walks you through the real building science behind why pipes freeze, the most effective low-cost fixes you can do this weekend, and the upgrades worth investing in for long-term protection. Whether you rent an older apartment or own a 1960s ranch house, there is a practical solution here that fits your budget and your skill level.
What You’ll Need
Click on an item below to shop for the recommended items for this recipe on Amazon.
As an Amazon Associate, we earn from qualifying purchases.
How to Do It
- Open cabinet doors under sinks on exterior walls in kitchens and bathrooms. This lets the warmer interior air circulate around the pipes, raising the temperature in that cabinet by 5 to 10 degrees.
- Set one faucet on each affected exterior wall to drip at about 1 drip per second. Prioritize the faucet farthest from the water meter, since that pipe has the longest run through cold space.
- Set your thermostat no lower than 55 degrees Fahrenheit, even when away or sleeping. Below 55 degrees, interior wall cavities and cabinet spaces can drop to freezing in sustained cold weather.
- Locate your main water shutoff valve so you can turn off the water supply within seconds if a pipe does burst. Know whether it is a gate valve (round handle) or ball valve (lever handle).
- Close the garage door if any water supply lines run through the garage. Garage temperatures can drop to outdoor ambient levels within 30 minutes of the door being left open in subfreezing weather.
- Walk your home and identify all pipes in unheated or poorly heated spaces: crawl spaces, garages, unfinished basements, exterior wall cabinets, and attics. Mark them with tape so you know what to address.
- Measure the diameter of your pipes (most residential supply lines are 1/2 inch or 3/4 inch) and purchase foam pipe sleeves in matching sizes. Buy enough for every foot of exposed pipe plus 10% extra for waste and overlaps.
- Slit each foam sleeve along its pre-cut seam, slide it over the pipe, and press it closed. At elbows and tee fittings, cut the foam at 45-degree angles and butt the pieces tightly together. Seal all seams and joints with foil-backed HVAC tape, not duct tape, which degrades in cold and damp conditions.
- Use expanding spray foam or caulk to seal any gaps where pipes penetrate exterior walls, sill plates, or foundation walls. Even a 1/4-inch gap can allow enough cold air infiltration to freeze an adjacent pipe. Fill from both the interior and exterior side if accessible.
- In the coldest spots, such as pipes running along an exterior foundation wall or through a crawl space with no insulation, apply self-regulating heat cable before sliding on the foam sleeve. Follow the manufacturer’s instructions for wrapping, plug it into a GFCI outlet, and verify the thermostat activates below 38 degrees Fahrenheit.
- After completing the work, run all faucets briefly to confirm water flow is normal, and check your work visually on the first night temperatures drop below 25 degrees to confirm no problem areas remain.
- Hire an insulation contractor or energy auditor to perform a blower door test and thermal imaging scan. This pinpoints exactly where cold air is entering the building envelope and where pipes are most at risk, rather than guessing.
- Have the contractor spray closed-cell foam insulation on the interior of the rim joist (the framing that sits on top of the foundation wall). At R-6.5 per inch, two inches of closed-cell foam brings the rim joist to roughly R-13, eliminating one of the most common pipe-freezing zones in older homes.
- For vented crawl spaces, have the contractor encapsulate the crawl space with a heavy-duty vapor barrier on the ground and insulate the crawl space walls rather than the floor above. This transforms the crawl space into a semi-conditioned zone where temperatures stay above freezing even in extreme cold.
- Ask about adding a small thermostatically controlled crawl space heater or exhaust vent to maintain the space above 40 degrees on the coldest nights. These units cost $80 to $200 and use minimal electricity compared to the cost of a burst pipe.
- After the project is complete, file for the 25C federal tax credit, which covers 30% of insulation and air-sealing costs up to $1,200 per year. Many states also offer additional rebates through utility programs.
Why It Works: The Benefits
A single burst pipe can release 250 gallons of water per hour. Prevention costs averaging $50 to $300 per season are a fraction of the average insurance claim of $11,000 for water damage caused by frozen pipes.
Insulating and air-sealing crawl spaces and rim joists where pipes are exposed can reduce whole-home heating energy use by 10 to 15%, since these areas are often the biggest sources of heat loss in older homes.
Insulated pipes lose less heat between the water heater and the tap, meaning you wait less time for hot water and waste less water. Studies suggest insulated pipes can deliver water 2 to 4 degrees warmer at the tap, allowing you to lower your water heater setpoint slightly.
Repeated freeze-thaw cycles stress pipe joints and fittings even when a full burst does not occur. Proper insulation reduces this thermal cycling, extending the service life of copper and PVC plumbing by years.
With proper protection in place, you can leave home for a weekend without worrying about returning to a flooded house. Self-regulating heat cable with a built-in thermostat activates automatically when temperatures approach freezing.
💰 Savings Impact by Action
Insulating hot water pipes in unheated spaces reduces heat loss from the water supply, cutting water heating energy use by up to 10% and delivering water 2 to 4 degrees warmer at the tap.
Air sealing and insulating the rim joist, one of the leakiest areas in most older homes, can reduce whole-home heating energy use by 10 to 15% by eliminating a major cold air entry point.
Encapsulating a vented crawl space reduces floor heat loss and moisture infiltration, lowering heating costs by 15 to 18% in homes where the crawl space was previously open to outdoor air.
A single prevented burst pipe eliminates an average $11,000 insurance claim and avoids weeks of remediation, representing a complete return on any reasonable prevention investment.
🏠 Key Concepts Explained
The Science Behind It
Water is one of the few substances that expands when it freezes, increasing in volume by about 9%. Inside a rigid pipe, that expansion has nowhere to go. The resulting pressure can exceed 2,000 pounds per square inch at the ice blockage point, which is far beyond what copper or PVC can withstand. The pipe does not always burst at the freeze point, though. The pressure spike travels through the water column and often causes failure at a weak point like a joint, elbow, or valve that may be far from where the ice formed.
The rate at which a pipe freezes depends on two variables: the temperature differential between the water inside and the air outside, and the thermal resistance of everything between them. Insulation increases thermal resistance, slowing the rate of heat loss. A bare copper pipe in a 10-degree crawl space will lose heat roughly 30 times faster than the same pipe wrapped in R-4 foam insulation, because still air is an excellent insulator and the foam creates a thick layer of it. This is why even basic foam pipe sleeves provide meaningful protection during brief cold snaps, while a combination of insulation plus heat cable handles sustained extreme cold.
Self-regulating heat cable works through a clever material property called Positive Temperature Coefficient (PTC) resistance. The cable contains a conductive polymer core whose electrical resistance rises sharply as it warms. When the pipe is cold, resistance is low, current flows freely, and the cable produces maximum heat. As the pipe warms toward safe temperature, resistance rises, current drops, and heat output falls automatically. This means the cable consumes electricity only when and where it is needed, making it far safer and more efficient than older constant-wattage heating tape, which could overheat and start fires if coiled or overlapped.
Frequently Asked Questions
▼ I turned on the faucet and nothing came out. Is my pipe already frozen?
A complete loss of flow to one faucet while others work normally strongly suggests a frozen pipe in that supply line. Do not panic and do not use an open flame. First, open the faucet to relieve pressure, then apply gentle heat using a hair dryer on low or warm towels wrapped around the pipe, starting from the faucet end and working toward the wall. If you cannot locate the frozen section or flow does not return within 30 minutes, call a plumber immediately, because a burst may have already occurred behind the wall.
▼ My pipes froze even though I kept the heat on. What went wrong?
Keeping interior heat on helps but does not protect pipes in spaces that are thermally disconnected from your living area, such as uninsulated crawl spaces, exterior wall cavities, and garages. The thermostat controls the air temperature in your living room, not in those cold pockets. Check whether the affected pipes run through an unheated zone and address those specific locations with foam insulation and heat cable, regardless of your interior thermostat setting.
▼ Can renters do any of this without landlord permission?
Renters can safely do the no-cost steps: opening cabinet doors, dripping faucets, and keeping the thermostat above 55 degrees. Foam pipe sleeves in cabinet areas under sinks are typically removable and non-destructive, so most landlords do not object, but it is worth a quick ask. For any air sealing, heat cable installation, or structural changes to the crawl space, notify your landlord in writing and frame it as protecting their property from a costly insurance claim. Many landlords will cover the material costs when they understand the liability.
▼ How much does a burst pipe actually cost to fix?
Plumber repair costs for the pipe itself typically run $150 to $500, but that is rarely the full story. Water damage remediation including drying, mold treatment, drywall replacement, and flooring repair averages $11,000 per claim according to the Insurance Information Institute, and can reach $70,000 or more in severe cases. Even with insurance, deductibles, rate increases, and the disruption of living in a damaged home make prevention the vastly better financial choice.
▼ Will foam pipe insulation work in a crawl space that gets really wet?
Standard polyethylene foam pipe sleeves resist moisture reasonably well for short-term exposure, but in a consistently wet crawl space, the foam can absorb water over time and lose insulating value. In that situation, prioritize crawl space encapsulation and drainage first, then insulate the pipes. Alternatively, use closed-cell rubber pipe insulation, which has better moisture resistance than polyethylene foam and is rated for damp environments.
Quick Tips
- Insulate both hot and cold water pipes in unheated spaces. Hot water pipes can freeze too if the water has been sitting still, and uninsulated hot pipes lose heat energy you already paid for.
- Disconnect and drain outdoor hose bibs before the first freeze. An attached hose traps water in the spigot and the pipe behind it, leading to one of the most common and overlooked freeze points in any home.
- If your home uses a well pump in an unheated outbuilding or pit, make sure the pressure tank and all connecting pipes are insulated or have heat cable installed. A frozen well line can leave you without water for days.
- After any work in a crawl space or basement, always verify that access hatches and foundation vents are properly closed or sealed before winter. A propped-open crawl space vent can bring the entire space to outdoor temperature overnight.
Variations for Your Situation
- Apartment or Rental: Renters cannot modify plumbing or insulation without permission, but they can protect cabinet pipes with removable foam sleeves, use portable space heaters (safely, on hard floors, never unattended) to warm a bathroom with an exterior wall, and notify landlords in writing before a cold snap. If your unit has a history of frozen pipes, request that the landlord install heat cable as a condition of your lease renewal, as the repair liability falls on them.
- Tight Budget (under $50): Foam pipe sleeves cost $0.50 to $1.50 per linear foot and are the highest-value purchase you can make. For under $30, you can insulate all exposed pipes under your sinks and in your basement. Pair that with the free steps (dripping faucets, open cabinets, 55-degree minimum thermostat) and you have solid protection for most homes through a typical winter. Skip heat cable for now and add it the following season if you still have problem areas.
- Older Home (pre-1980): Homes built before modern energy codes often have supply pipes running directly through exterior wall cavities with zero insulation behind them, a design that was acceptable when fuel was cheap but is a freeze risk today. If you cannot re-route the pipes, the best approach is to insulate the exterior wall from the inside by carefully removing the cabinet back panel, adding rigid foam board behind the pipe, and resealing. A plumber or contractor can also re-route chronically problematic pipes to interior walls for $300 to $800, a one-time fix that eliminates the problem permanently.